
Getting Started with CI Using GitHub Actions
Creating, running, and debugging an end-to-end workflow


GitHub Actions provides a simple yet powerful way to automate tasks directly from within your GitHub repository. Whether you are setting up continuous integration, linting code, or running automated tests, the Actions UI offers an accessible starting point for creating, executing, and monitoring workflows.
In this guide, I will walk through the process of working with GitHub Actions entirely from the web interface, while also touching on how to bring those workflows into your local setup for further development.
Creating Workflow
There are several ways to create a GitHub Actions workflow. You can start with the GitHub UI to explore workflow templates and set up or tweak existing workflows quickly, which is great for getting started and visual feedback. Once you’re familiar or need more automation, switch to the GitHub CLI to manage workflows—listing, viewing, and manually triggering runs, or incorporating them into scripts for advanced control.
Let’s create our first workflow:
Deciding the Repository to Implement Actions
The first step is to access to the repository where you want to set up the workflows. After signing in to GitHub, select the repository from your dashboard or repositories list. Once on the repository’s main page, you’ll see the navigation bar at the top with tabs such as Code, Issues, Pull requests, Actions, and more.
Accessing the Actions Tab
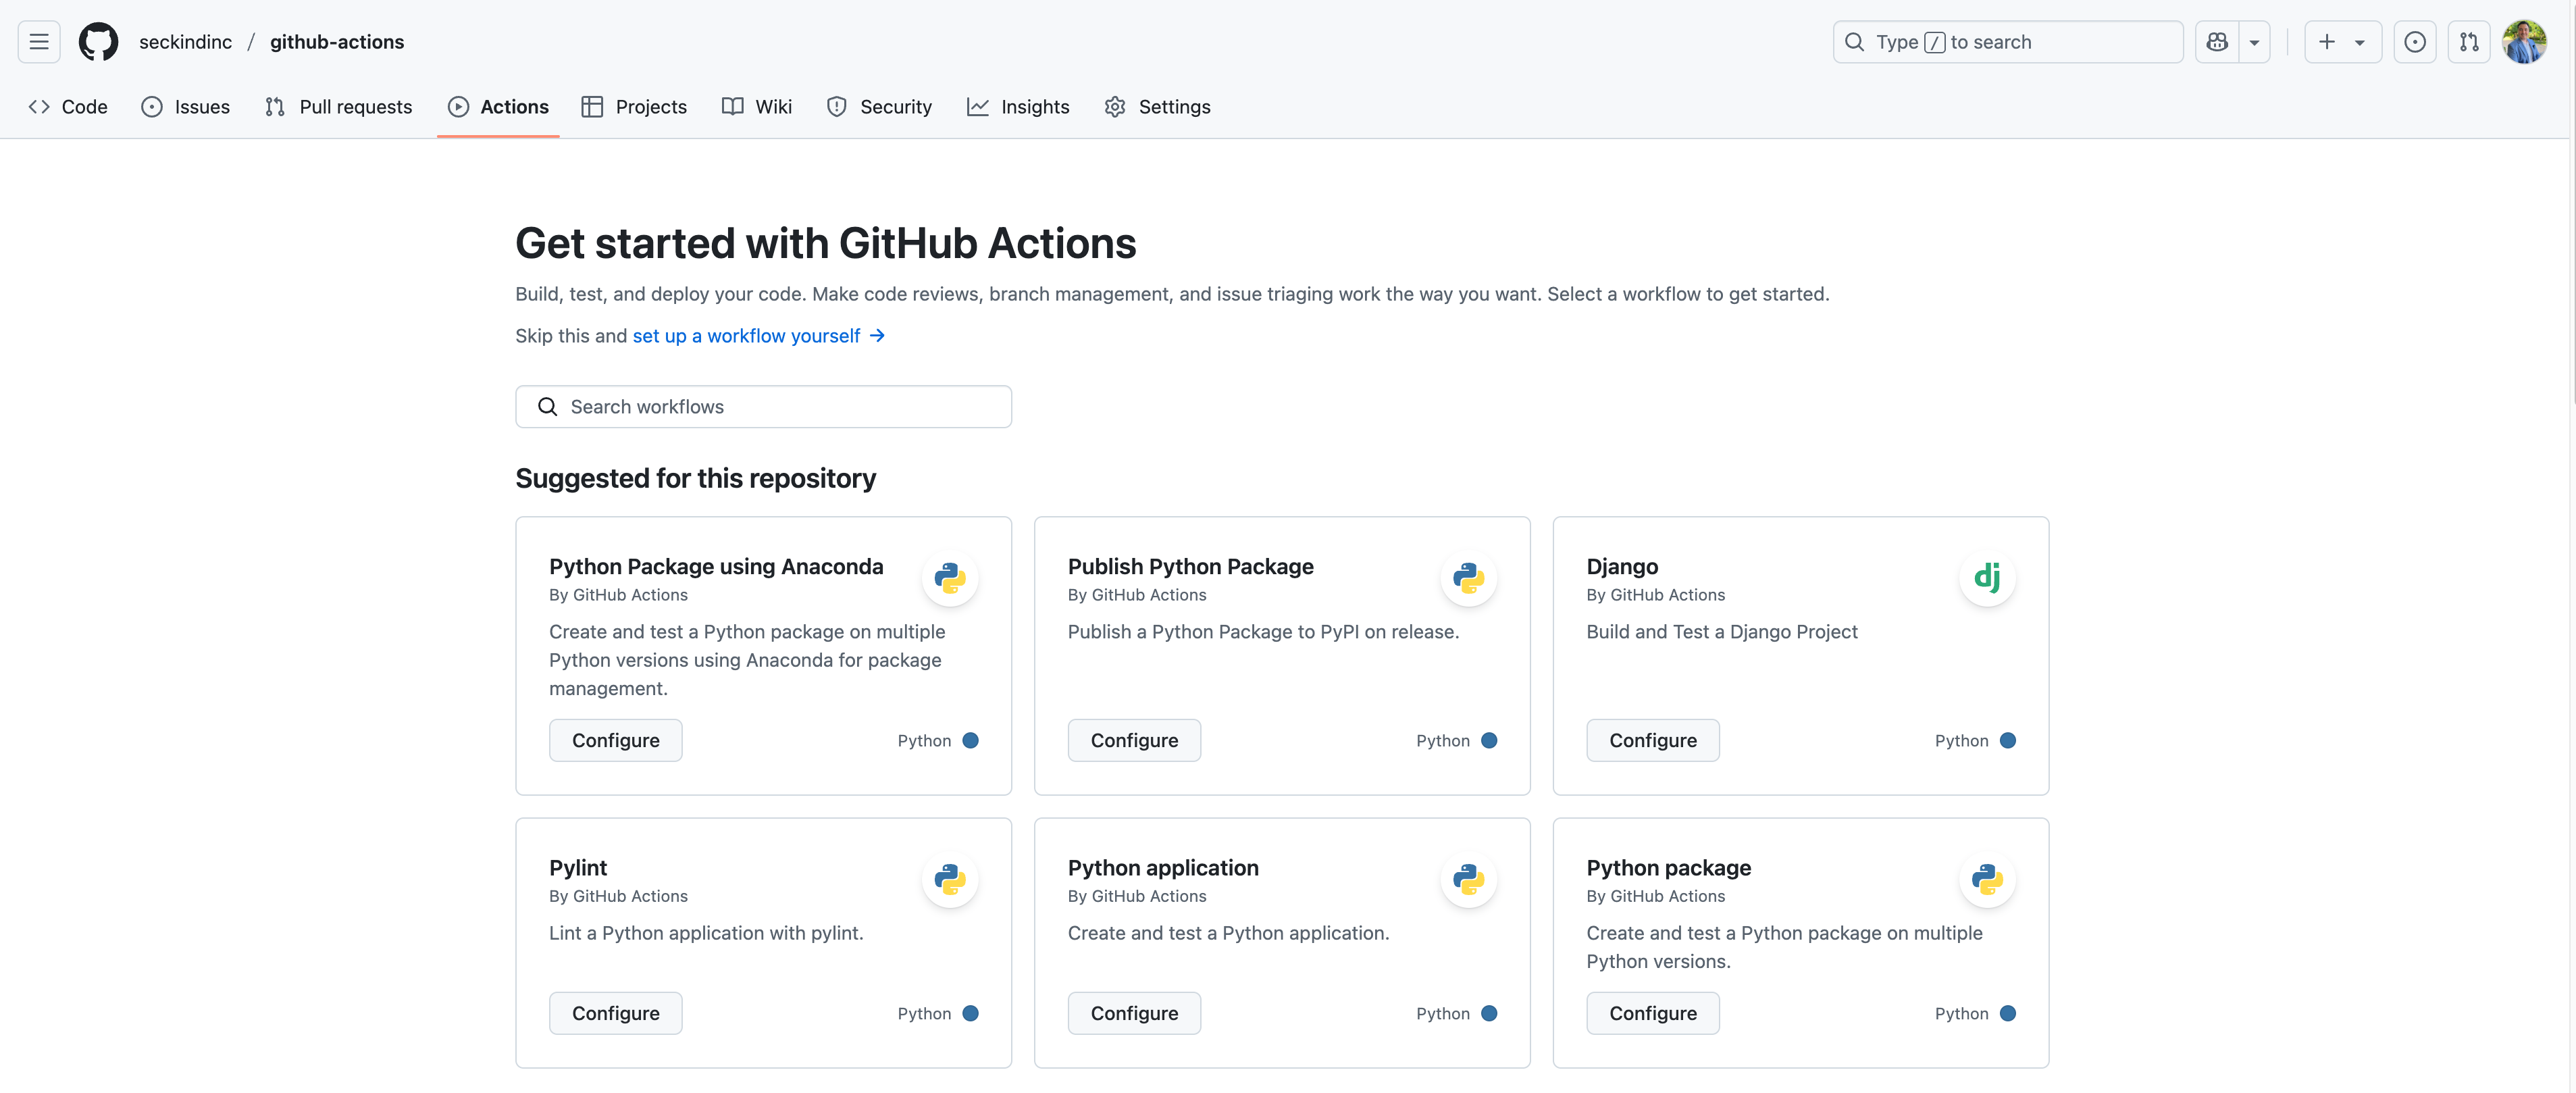
The Actions tab is the central hub for all your workflows. Clicking on it will either bring up a prompt to create your first workflow or display a list of all workflows that already exist in the repository. From here, you can review previous runs, monitor their status, and drill into logs to understand exactly what happened during each step.
Creating Workflows
name: Python Linting Check

on:
  pull_request:
    branches: [ main ]

jobs:
  lint:
    runs-on: ubuntu-latest
    steps:
    - name: Checkout code
      uses: actions/checkout@v4

    - name: Set up Python
      uses: actions/setup-python@v4
      with:
        python-version: '3.9'

    - name: Install black
      run: pip install black

    - name: Check formatting
      run: black --check .
This simple workflow is designed to check whether the Python code pushed through a Pull Request complies with linting standards. If any issues are found, the workflow will fail. In this article, I’ll focus exclusively on creating the workflow itself; a detailed breakdown of each part of the YAML file will be provided in the next article.
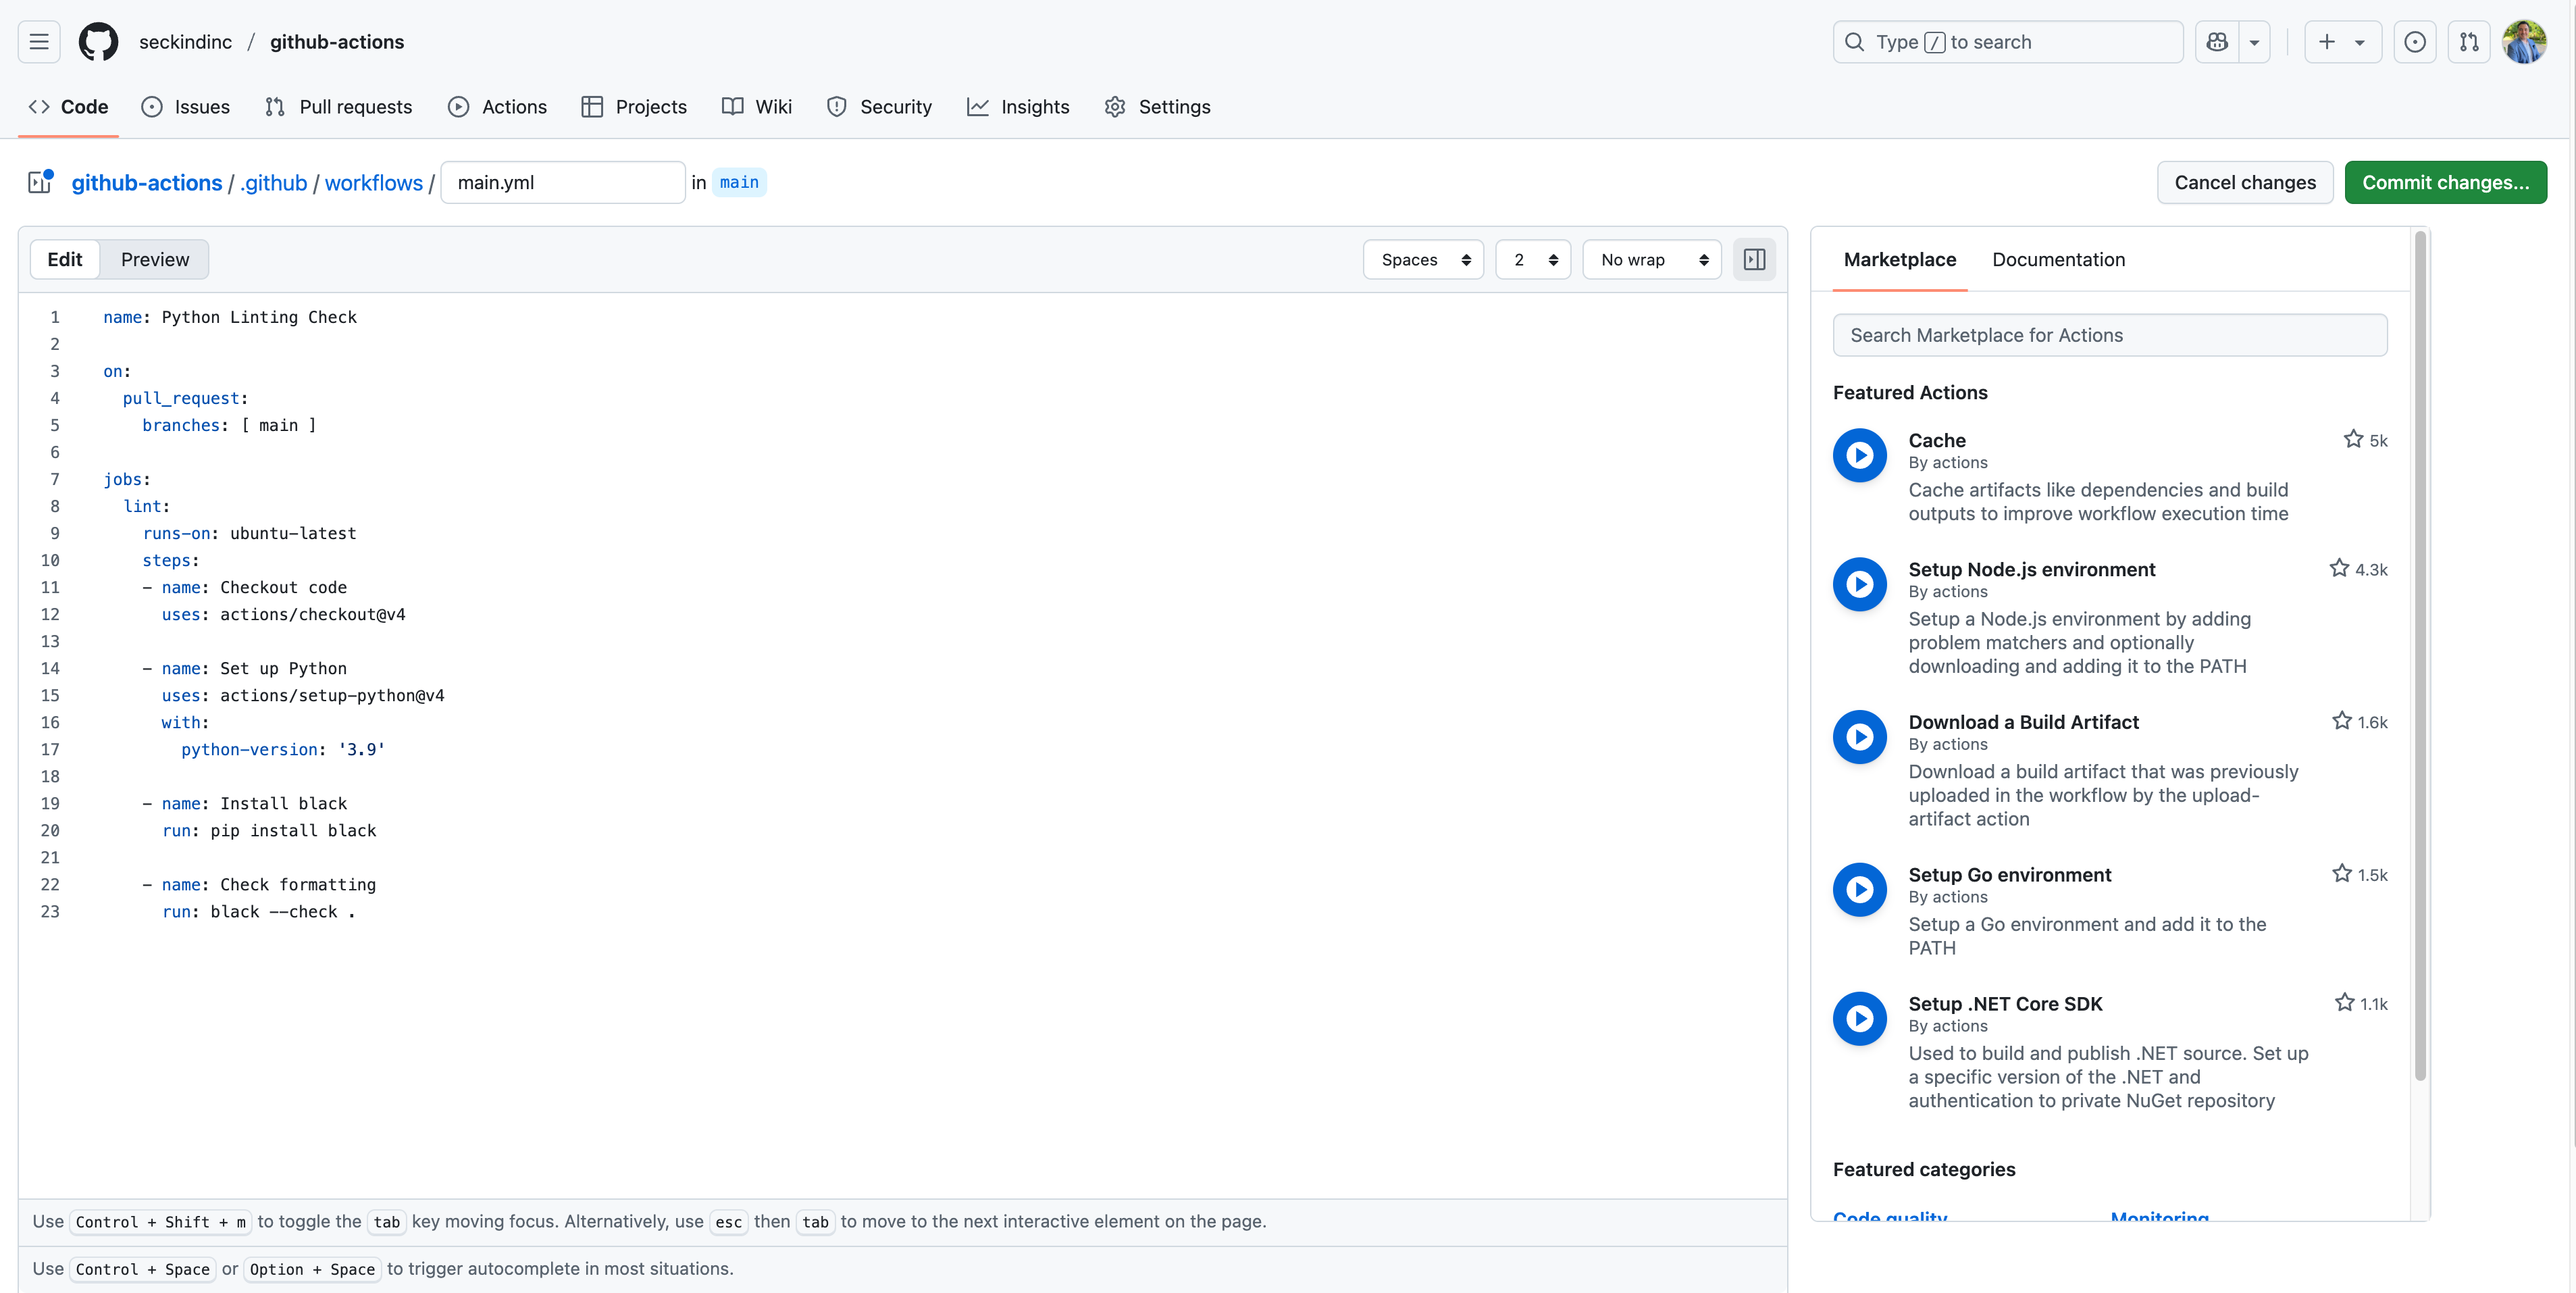
Let’s start with the UI implementation. After pasting the YAML file to define the workflow, we click on Commit changes, which merges the file directly into the main branch. While this is a quick way to proceed, it's not considered best practice—especially in collaborative environments—since it bypasses code review and testing via pull requests.
Once the changes are committed, you’ll be redirected to the updated folder structure, where the workflow file is now located under .github/workflows.
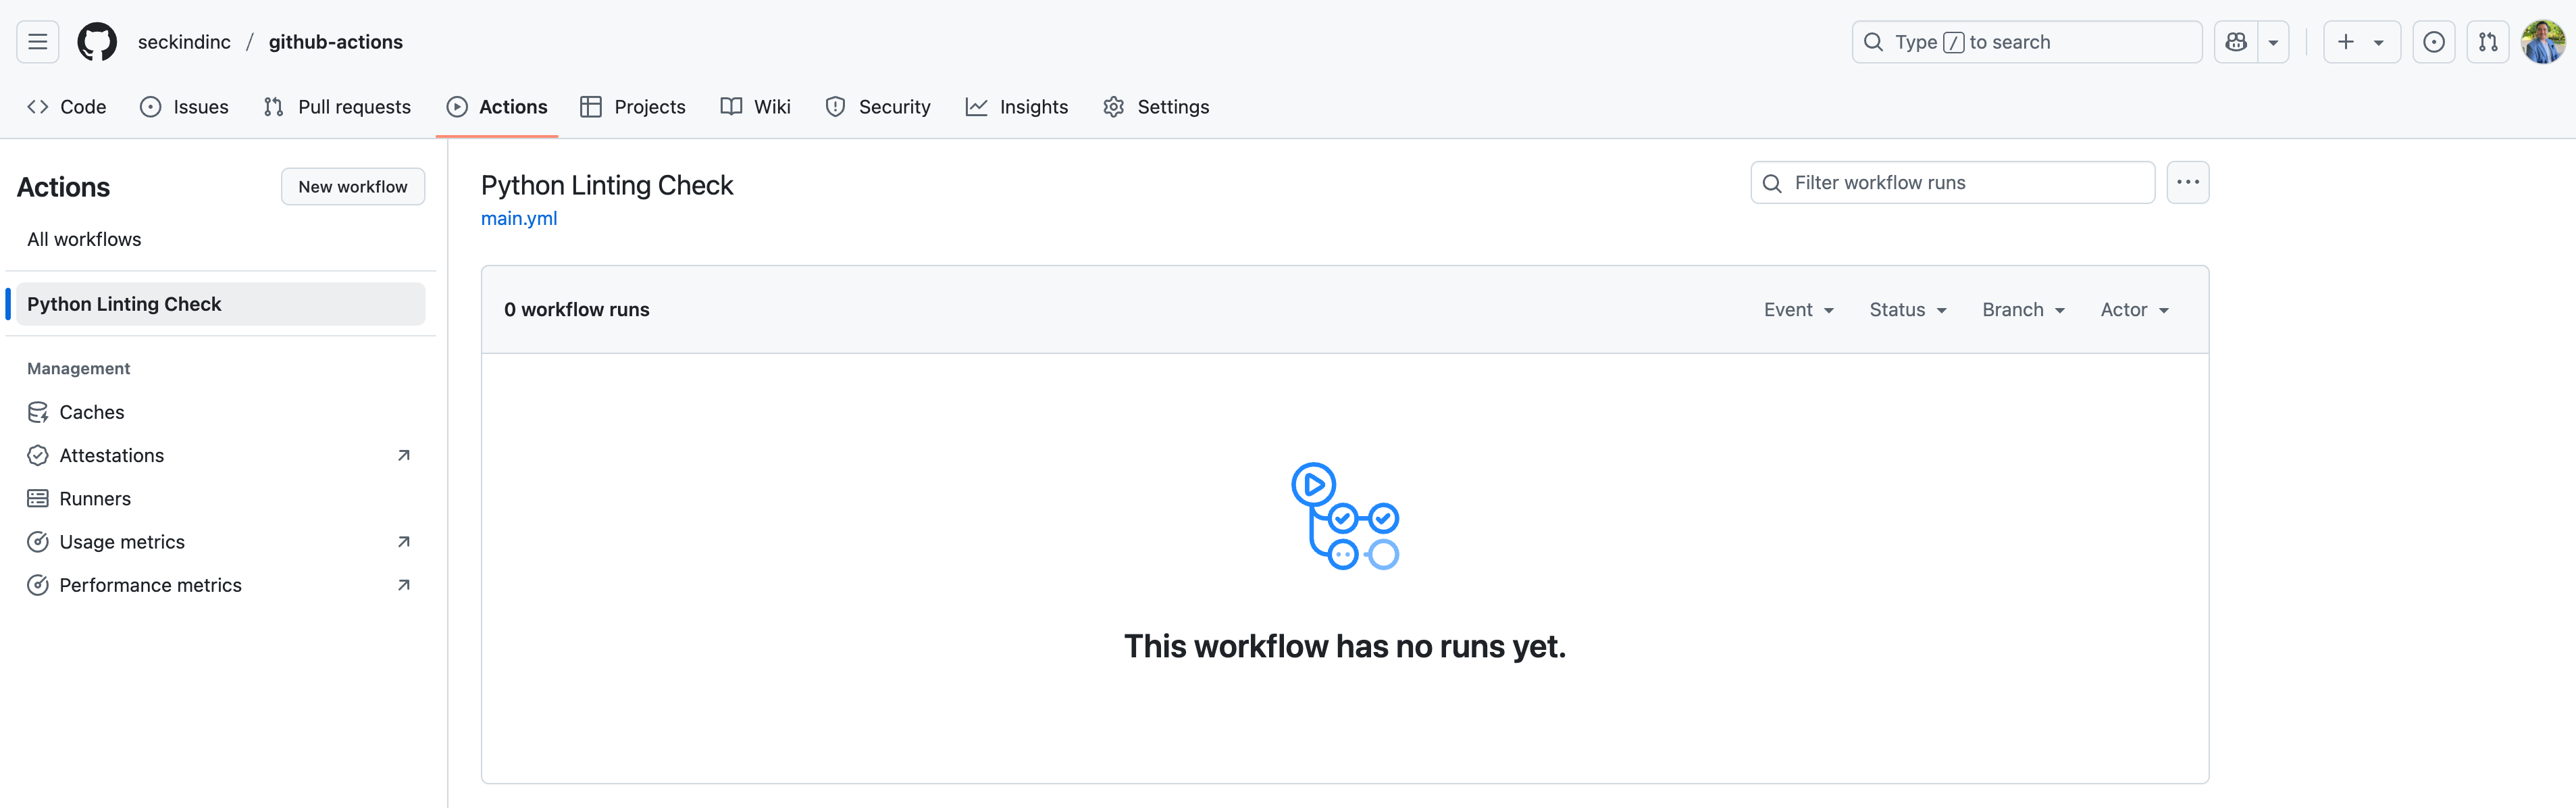
Next, navigate to the Actions tab. You’ll notice a new user interface displaying all existing workflows along with their run history, giving you visibility into the automation processes tied to your repository.
This time, I’ll use the same YAML content to manually create a new workflow file from the command line. After pushing the changes to GitHub, you can clearly see that the previous workflow has been removed and a new one has been created in its place.
Executing, Debugging, and Fixing the Workflow
I have a simple, though poorly formatted, Python file that contains several linting issues. I’ll create a new branch, make some additional changes to this file, and then open a Pull Request. This will trigger our workflow, which runs automatically on Pull Request events.
def hello_world():


    print("Hello, World!")


    print("Hello, World! Again")

    print("Hello, World! Again 2")

    print("Hello, World! Again 3")


hello_world()
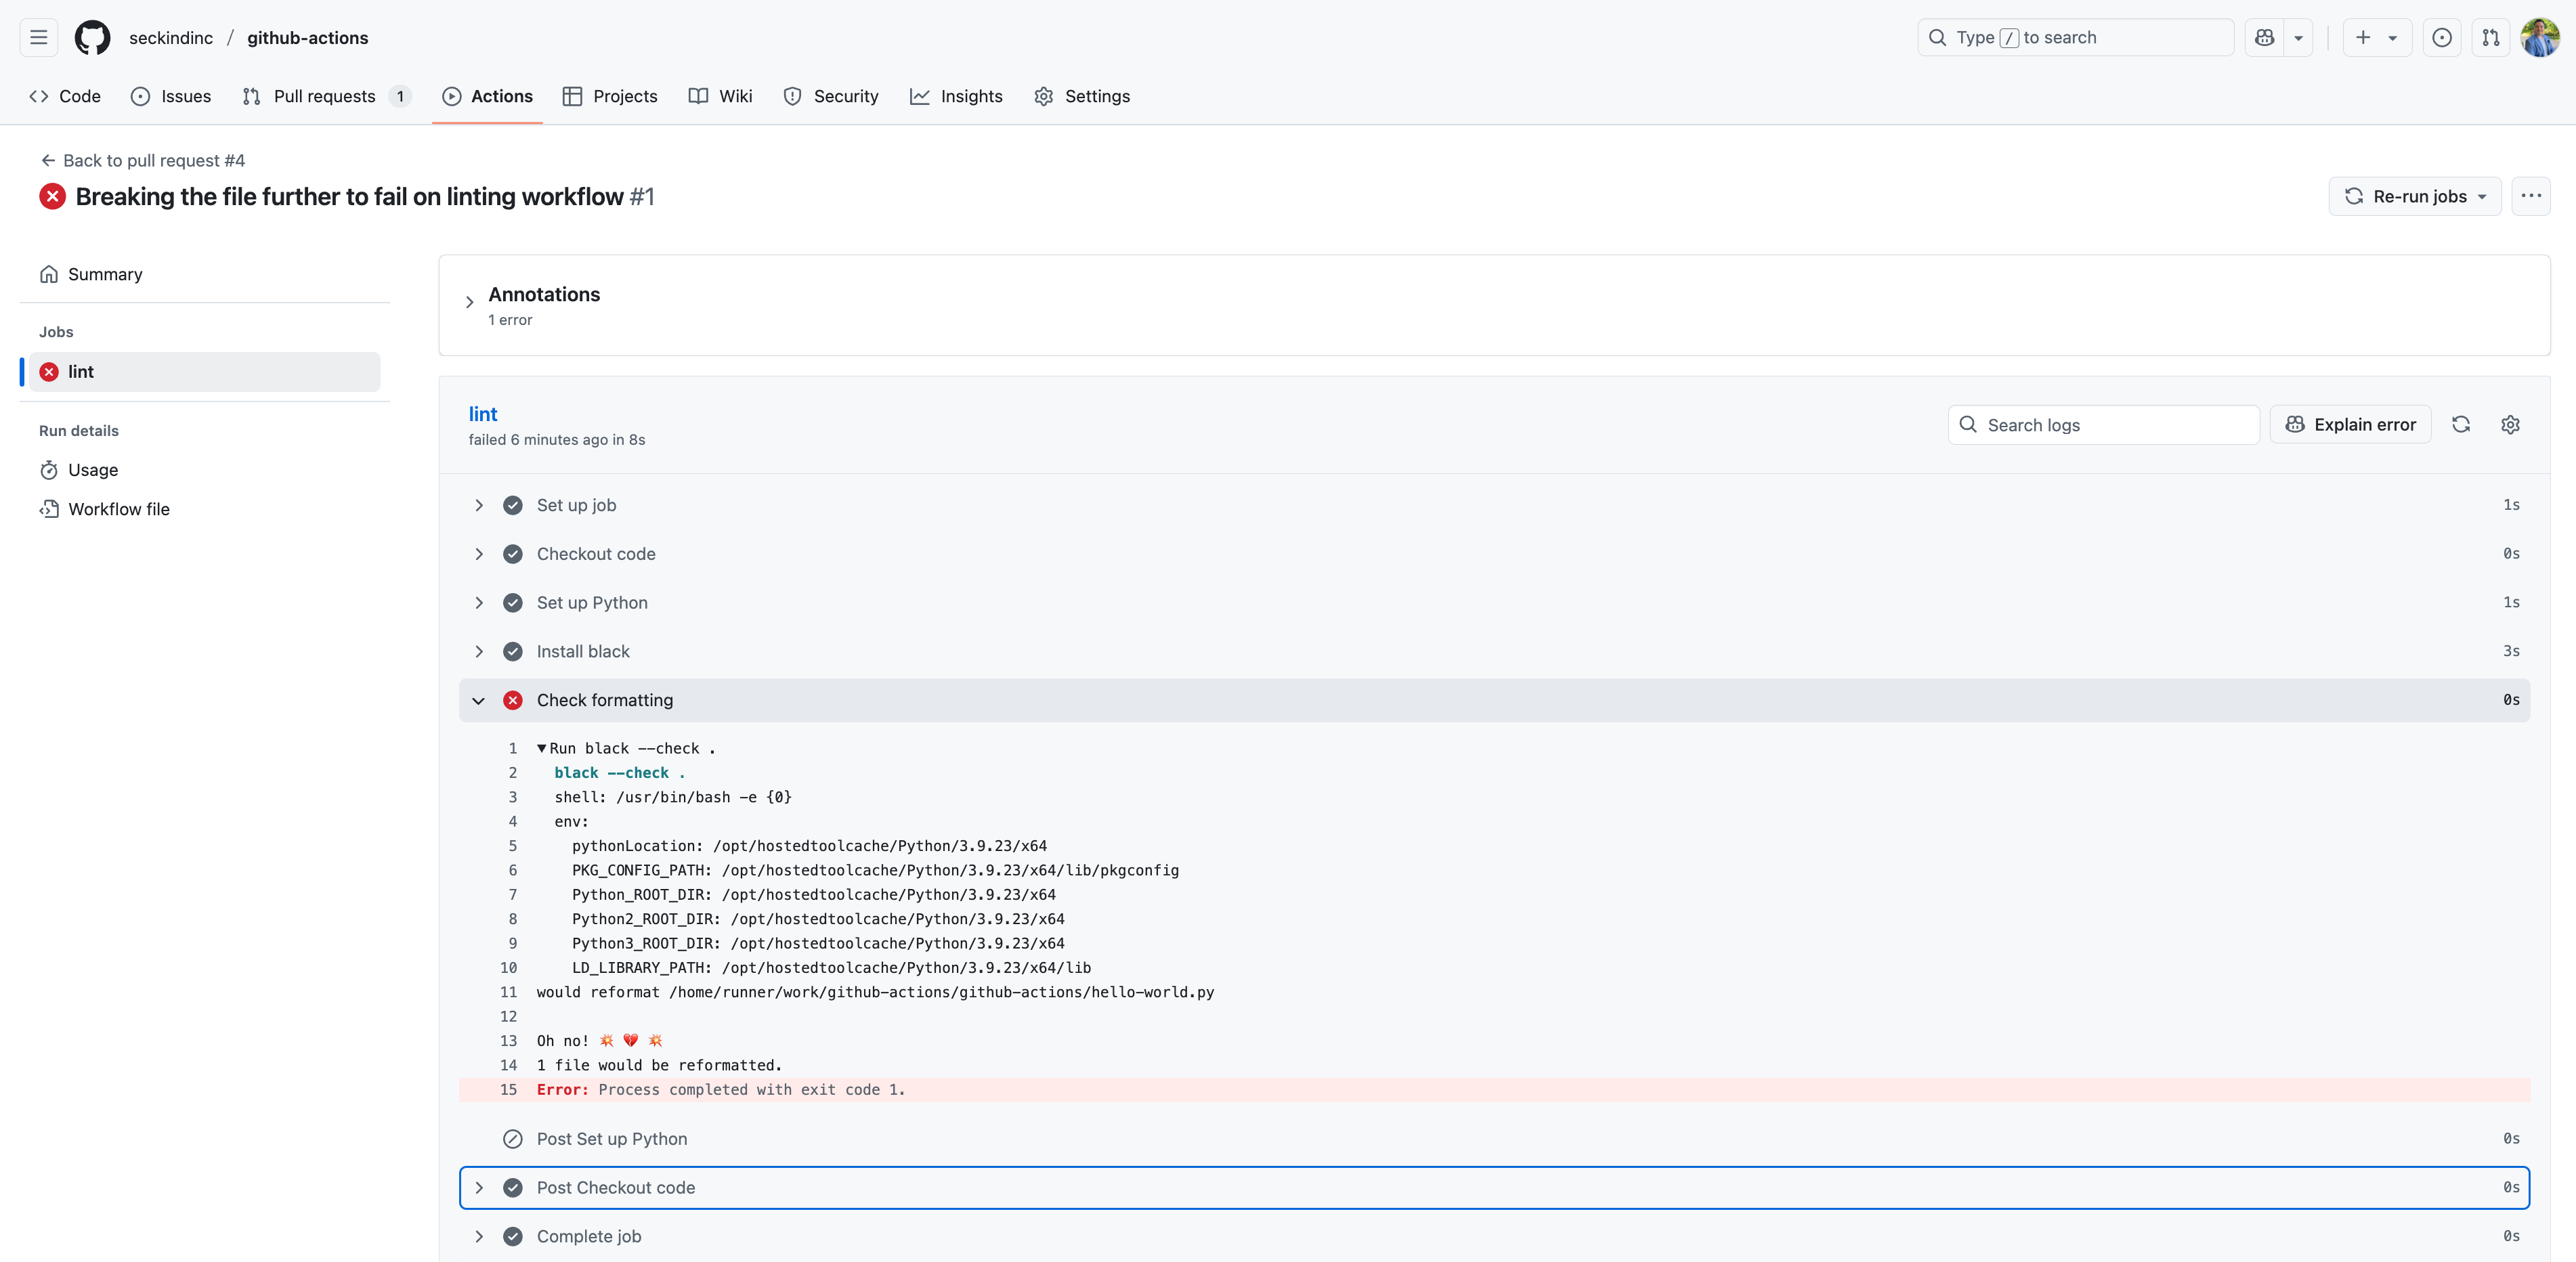
If we navigate to the Pull Request UI, we’ll see that the workflow has failed—exactly as expected.
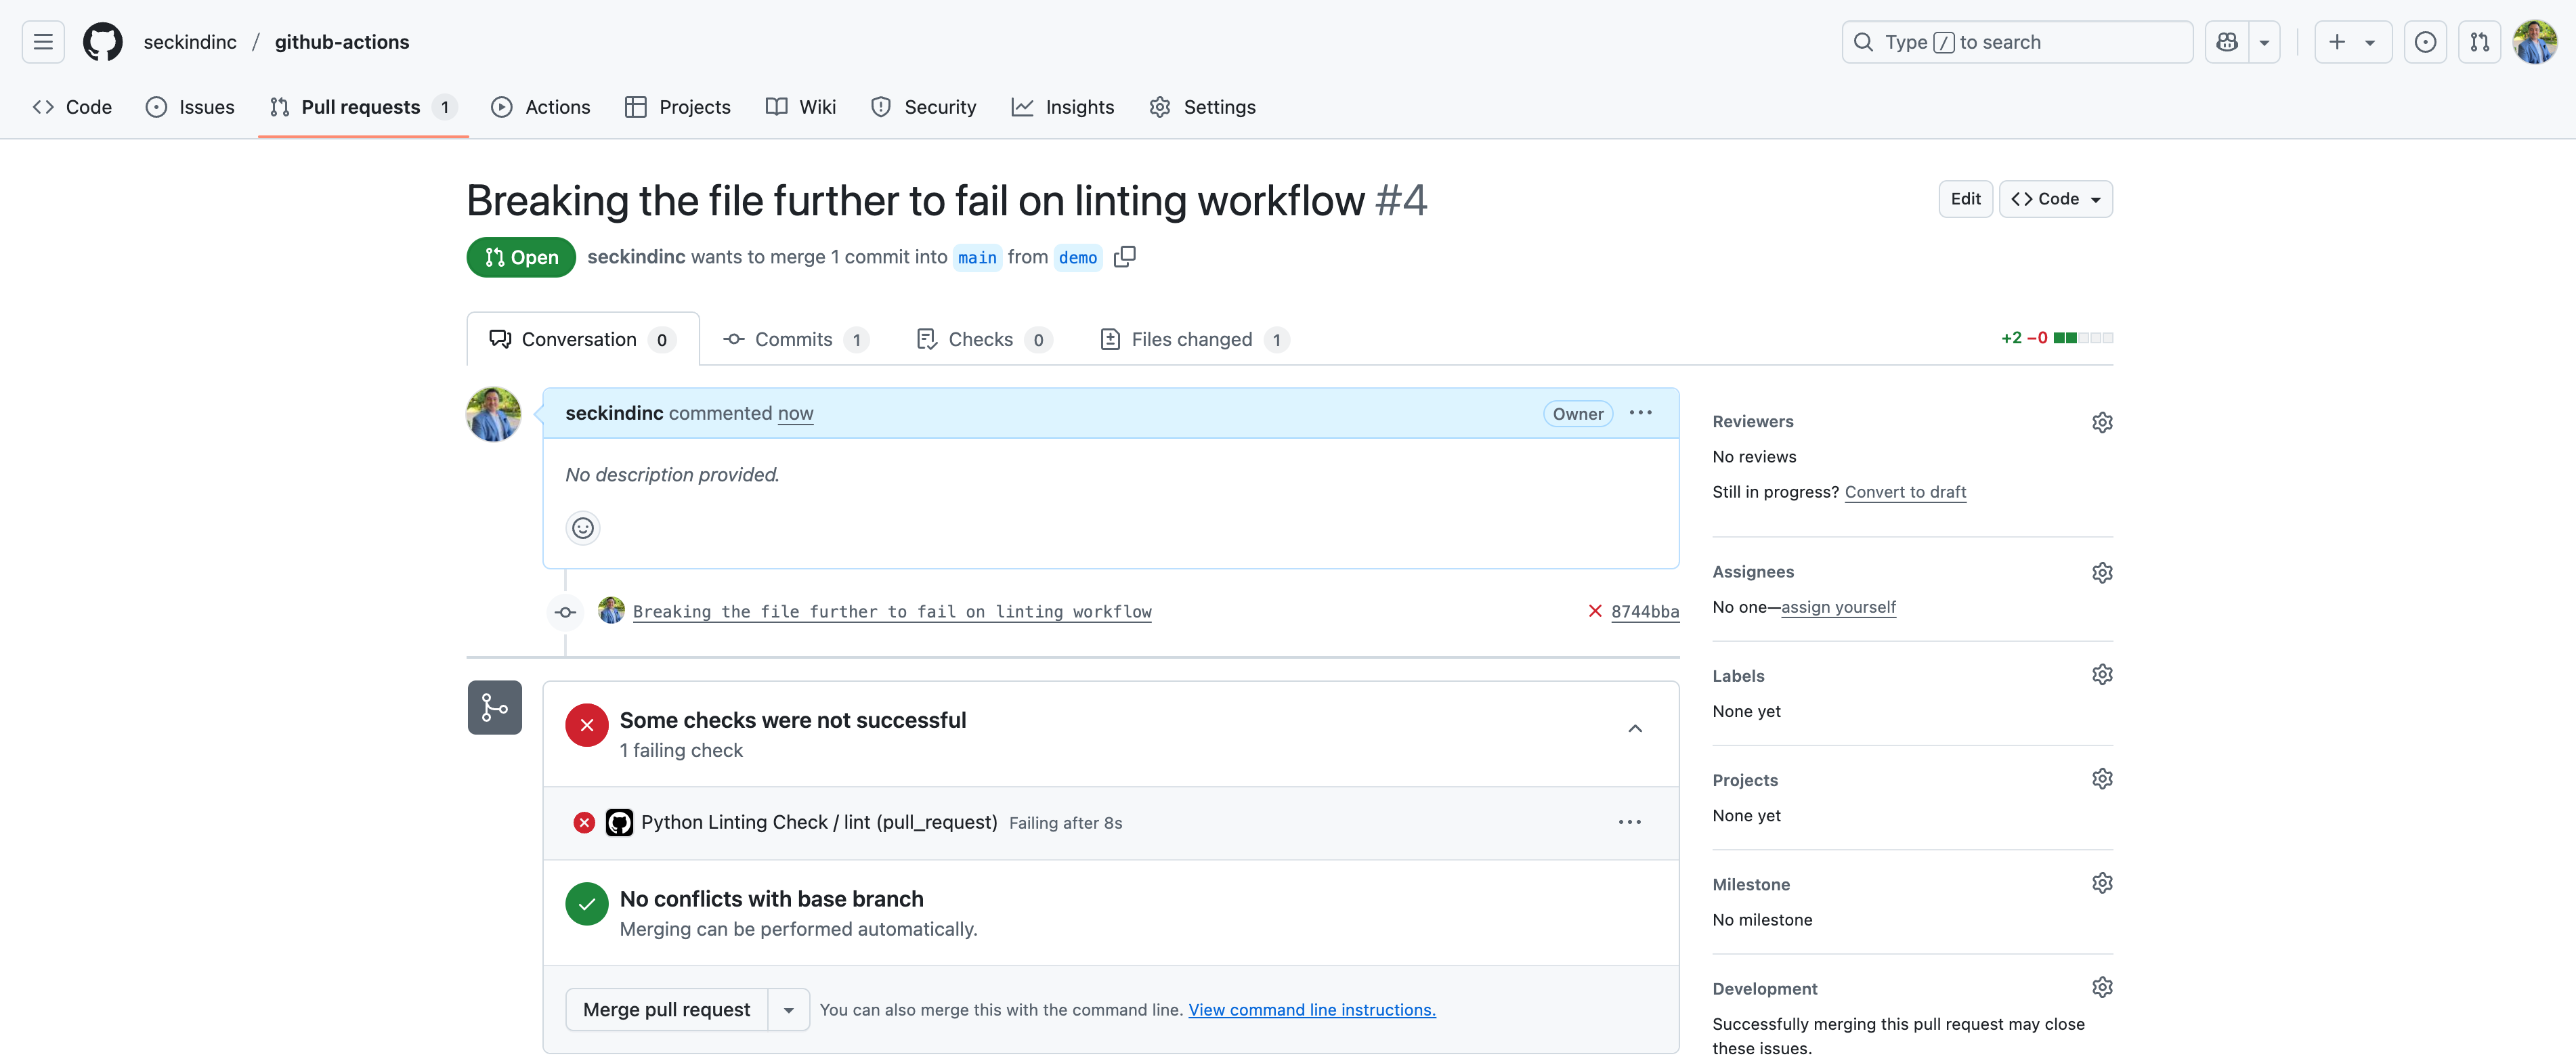
When we click on the workflow run, we’re taken to a detailed view in a new UI. As shown, the workflow failed as expected—it analyzed the file and detected formatting issues that did not meet the specified linting standards.
This setup is extremely useful for detecting and blocking Pull Requests that don’t meet our linting standards. However, to take a more pragmatic approach, we can go a step further: instead of simply failing when issues are found, why not fix them automatically?
To do this, I’ll update the workflow to automatically apply the Black code formatter when linting problems are detected, and then push the changes back to the Pull Request. Below is the updated YAML file that implements this behavior.
name: Python Linting Auto-Fix
on:
pull_request:
branches: [ main ]
jobs:
auto-fix:
runs-on: ubuntu-latest
permissions:
contents: write # Needed to push changes
steps:
- name: Checkout code
uses: actions/checkout@v4
with:
ref: ${{ github.head_ref }}
fetch-depth: 0
- name: Set up Python
uses: actions/setup-python@v4
with:
python-version: '3.9'
- name: Install black
run: pip install black
- name: Run Black formatter
run: black .
- name: Commit changes if needed
run: |
if [ -n "$(git status --porcelain)" ]; then
git config --global user.name "myusername"
git config --global user.email "mymailaddress"
git add .
git commit -m "chore: auto-format Python code with Black"
git push origin HEAD:${{ github.head_ref }}
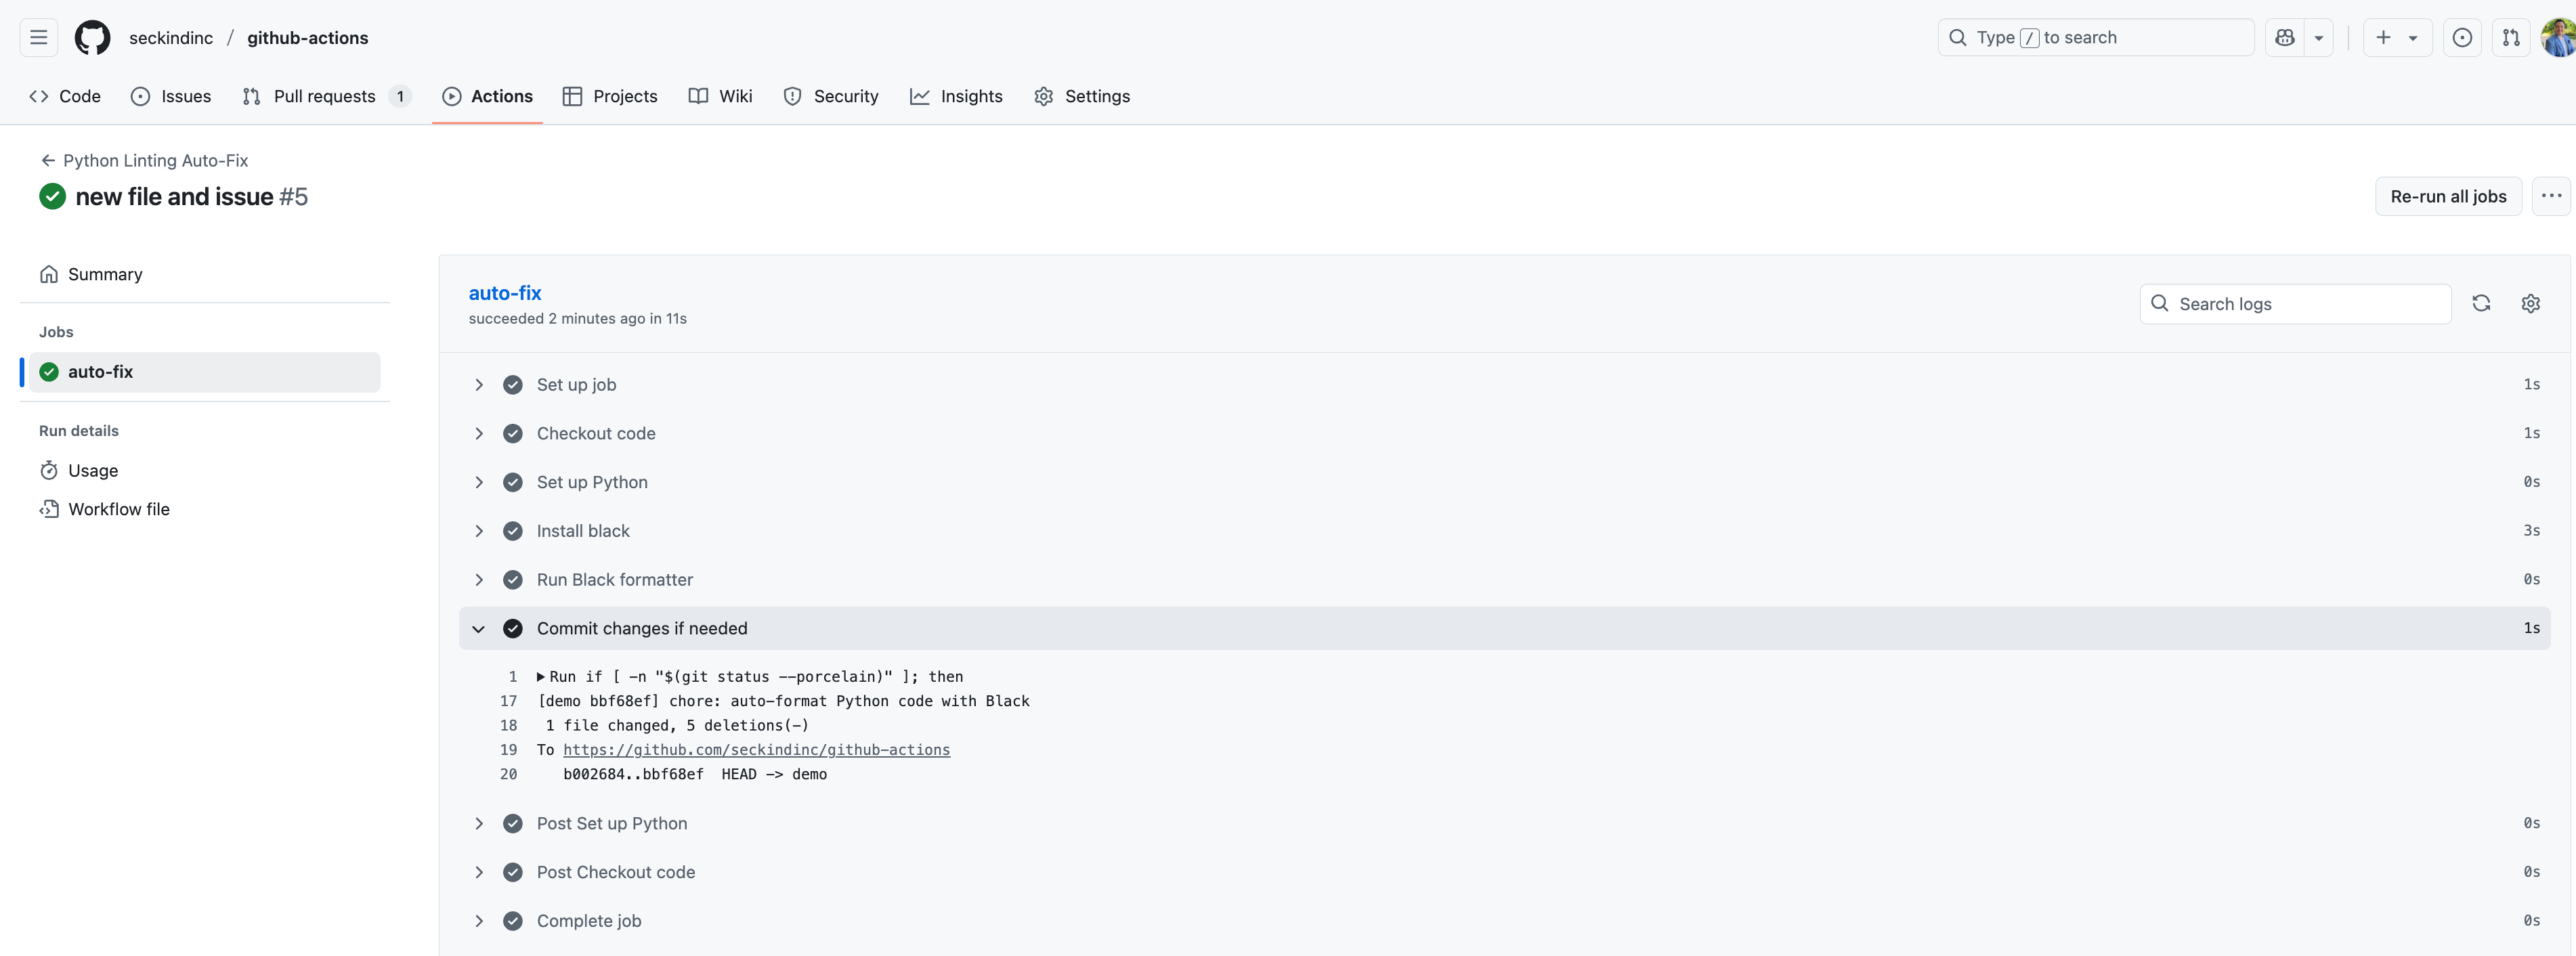
fiWhen I create a new Pull Request for the previously unformatted file, the updated workflow automatically detects and fixes the linting issues using the formatter, then commits the corrected code back to the PR.
Conclusion
Using GitHub Actions to automate tasks in your repository is a powerful way to streamline development and boost team productivity. Even simple workflows—like the one we've set up—can save time, reduce manual errors, and enforce consistent standards across your codebase.
In the next article, I’ll dive deeper into the core components of GitHub Actions—such as jobs, steps, runners, and actions themselves—and explain how they work together to build more advanced and flexible workflows. Whether you're aiming to implement CI/CD pipelines, automate testing, or handle custom deployment logic, understanding these components will be key to unlocking the full potential of GitHub Actions.